Or, select New on the File menu.

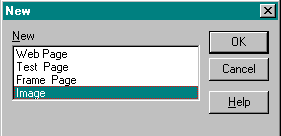
The New box appears.
The New Image box is displayed.
The default width of 640 pixels by a length of 480 pixels (which is approximately 8.5 inches by 6.4 inches).
The Color Pallet is displayed.
The image area is displayed.
The object that you previously created is listed. (Only objects with the *.imi extension are listed. Double click on the object name to load it.
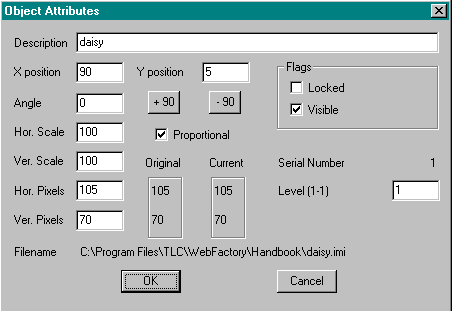
The Object Attributes box is displayed.
 The Object Attributes box provides the following information about the current object:
- Description: The description you assigned to the object, if any. You can change the description.
- Filename: The filename of the object, if it has been saved.
- X position: The position of the object, in pixels, from the left edge of the image window.
- Y position: The position of the object, in pixels, from the top of the image window.
- Angle: The degree at which the object is rotated.
- Hor. Scale: The percentage size of the object's original width, 100% being original size.
- Ver. Scale: The percentage size of the object's original height, 100% being original size.
- Hor. Pixels: The object's width in pixels
- Ver. Pixels: The object's height in pixels
- Serial Number: A unique number assigned to this object in the current image window for this work session only.
- Level: The level, or layer, the object currently occupies in relation to other objects in the image window. The lowest object, that is, furthest beneath other objects, is level 1.
- Flags: indicates special characteristics of the object, including whether it is:
- Locked
Locks the current object to prevent further movement or modifications to the object. If the current object is locked, this menu option changes to "Unlock". Selecting "Unlock" unlocks the current object, making it available to be moved or modified. - Visible
Displays the current object. If not checked, hides the object from view.
- Locked
A copy of the current object is made.
The clone sits directly on top of the original object, so you may not notice it until you move it to the side and see the original object beneath it. The clone is assigned the same description as the original object.

| |

| |
| Click on the Size button A two-tone colored box surrounds the object. Drag any of the grayed areas on the colored line to increase or decrease the size of the object. Click on another tool to remove the size box. |
You can also use Size/Rotate on the Object menu to re-size the current object. |
| Click on the Rotate button A two-tone colored box surrounds the object. Drag any of the grayed areas on the colored line to set the angle. Click on another tool to remove the rotate box. |
Select Size/Rotate on the Object menu. In the Size/Rotate box, click on the +90 or -90 box to rotate the object at 90 degree increments. You can also type in a specific angle. |
.
Note | Use Restore on the Object menu to restore the current object back to its original angle of rotation prior to selecting the Size/Rotate option. |
- Click on the object to select it.
- If it is hidden, then use Select by Description on the Object menu.
The Select Object box is displayed, which allows you to select an object from a list of the descriptions and object numbers of all objects in the current image window. - Click on the description of the object you want to select.
- Click OK.
The object is selected
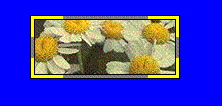
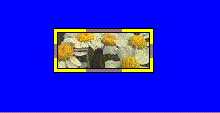
| Yellow object lowered | Yellow object raised |
If the current object is locked, this menu option changes to "Unlock." Selecting "Unlock" unlocks the current object, making it available to be moved or modified.
To prevent accidental modifications to the hidden object, this option also locks the object so that it cannot be moved or modified until it is unlocked.
Once the object is unlocked, this menu option changes to "Show". Selecting "Show" returns the object to view.
The image above contains several rotations and levels of the same object. .
Note | To add special effects to the objects, you can use any of the Object menu filters. Refer to Image Objects, Using Filters for more information. |
The original objects remains on top of the affixed copy, until you move or delete them. Affixed objects can no longer be moved; they become a permanent part of the image background.
If there is only one object or you want to affix a specific object, use the Affix Object option.
.
Note | If you do not affix the objects, after retrieving the saved image file, only the background is displayed. |
This option deletes all objects from the current image window. Any objects that were not previously saved are lost.
To delete a single object or a specific object, select Delete Object from the Object menu. If the object was not previously saved, it will be lost.
See Create Objects for more information on saving objects.

